The Ink Rub Tester or commnly known as sutherland rub tester determines abrasion resistance of printed material, labels, folding cartons, corrugated boxes, and other printed & packing materials. This instrument is based on, and is the equivalent to, the Sutherland Rub Tester as specified in ASTM D5264. The following tests can be executed using the Ink Rub Tester:
- Dry Rub
- Wet Rub
- Wet Bleed or Transfer
- Wet Smear
- Functional Rub
The Ink Rub Tester is used to evaluate the resistance of ink to either wet or dry rubbing or scuffing. It can also be used to evaluate the surface strength of unprinted container board to dry or wet rubbing, wet bleed or transfer and wet smear as per TAPPI standard T 830 and ASTM standard D5264. The Ink Rub procedures can differentiate between strong and weak ink films as well as their adhesion to container board and the container boards resistance to rubbing and scuffing.
Ink Rub Tester Apparatus
The IDM Ink Rub Tester is essentially a motor driven device for moving a weighted test specimen over a printed or unprinted sample through an arc of 8.5° ±0.5° approximately 3.9 cm for a predetermined number of strokes. The stroke comprises of one to-and-fro motion of the test weight. Test speeds can be selected from fixed speeds of 42 and 85 cycles per min. Both speeds are accurate within 2%. Weights of 908 ±45g (2lb) and 1816 ±90g (4lb) are provided each having 51.6 cm² (8 in²) of contact area. With these dimensions and weight, the relative pressures produced are 1.7 kPa (0.25 psi) for the 908g weight and 3.4 kPa (0.50 psi) for the 1814g weight. The test weights are fitted with neoprene pads of 3.2mm thick (1/8 in) with compressibility such that 172 ±34 kPa (25 psi) shall compress the pad to half of its’ original thickness.
Test Sample Preperation as per Sutherland Rub Test
When selecting samples for testing, use undamaged areas of board, avoiding wrinkled or folded areas, which may affect the test results.
Cut 5 top specimens 51 mm wide and of sufficient length to be secured to the clips on the relevant weight. Samples should be cut with a sharp knife. Cut 5 bottom specimens 152 mm x 76 mm (6 x 3 in).
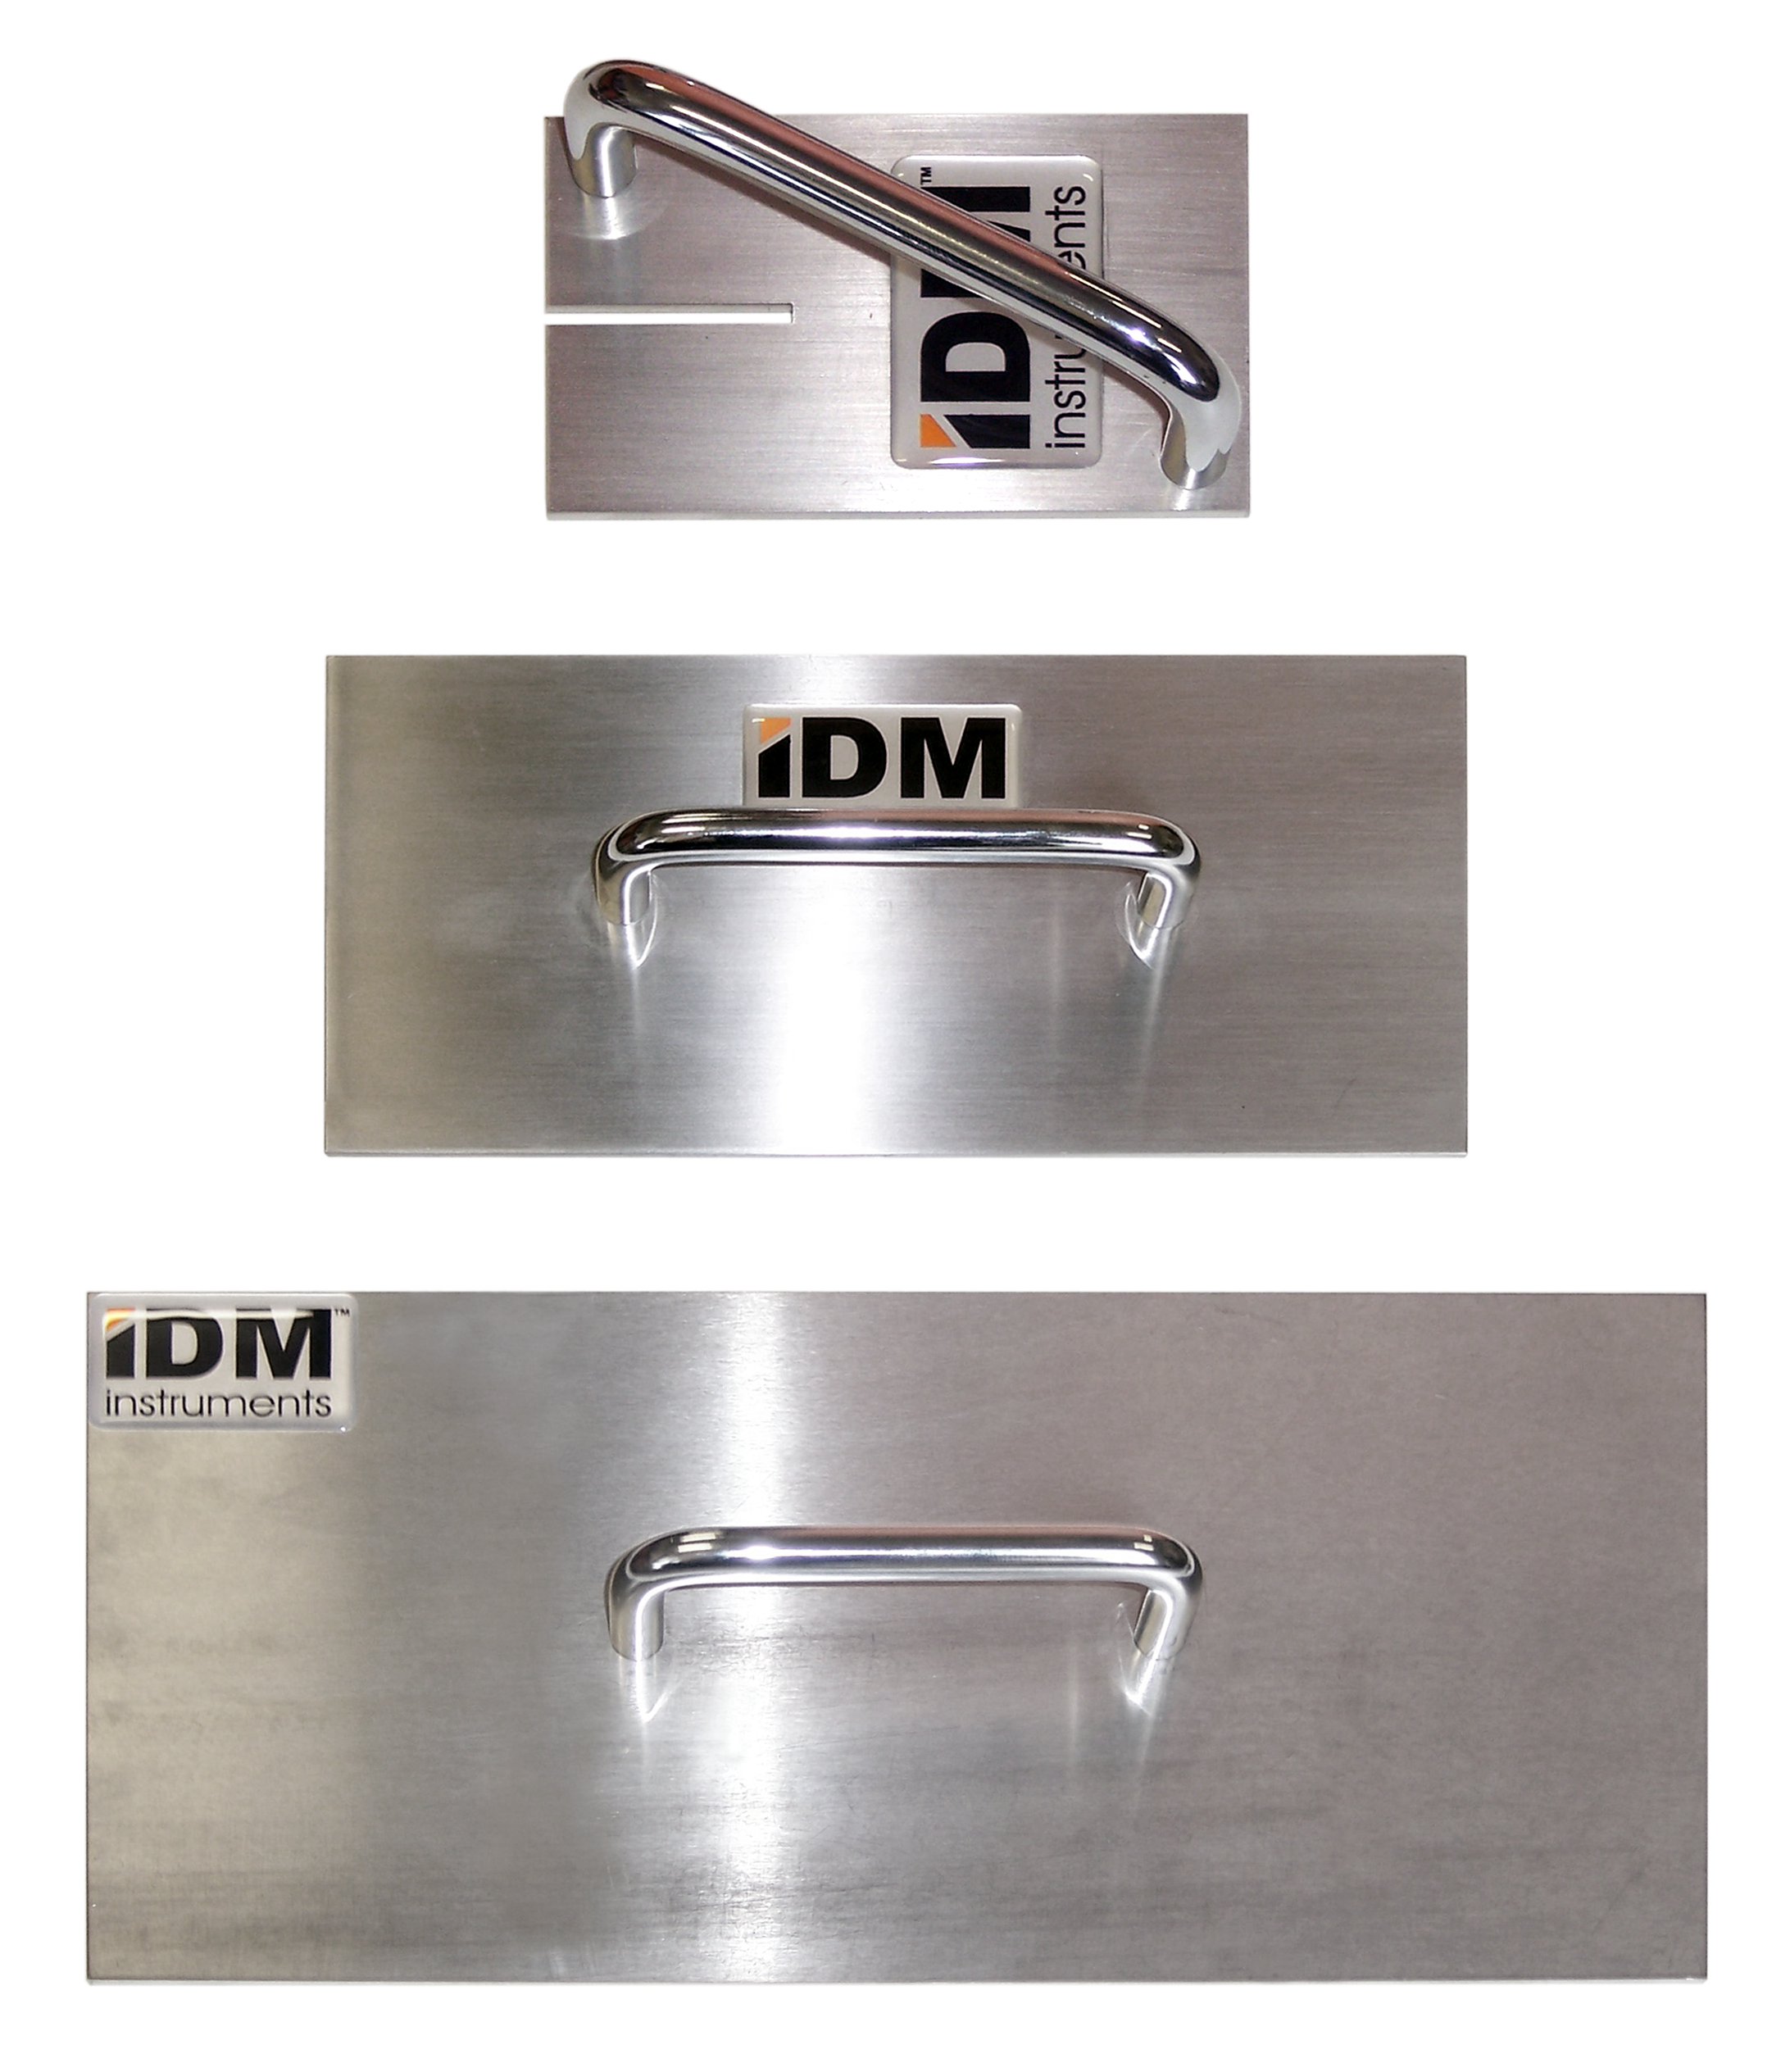
In order for the weight samples (white sheet or sample) to fit around the weight easily, the Creasing Board and Creasing Tool (see Diagram on page 9) is used to carry out a grove/bend in the test specimen. Simply place the sample onto the Creasing Board, and using the Creasing Tool, follow through the groove to initiate a crease.
Use our sample cutting templates to prepare accurate as per various testing standards and use these wide range of cutters.
Ink Rub Test Procedure
Dry Rub
Clip the 3 x 6 inch test strip block, with the printing surface away from the rubber pad. Mount the test specimen securely, print side up, on the rubber pad of the base plate. Using a camel hair brush, brush both the test strip and the test specimen thoroughly before starting the test. Place the Receptor over the sample, ensuring both surfaces are free of dirt. Preset the tester for 10 strokes* or for any number or strokes selected as standard for a particular printed surface. See Counter Operation. Once a number is set start operation by selecting the desired cycle speed. The machine will operate for the preset number of rubs each time the operator presses the Reset Button on the counter.
Stroke comprises one complete to and fro motion of the Receptor.
When the rub has been completed, examine both the test specimen and test strip for signs of transfer. The two pieces should be stapled together and used for visual reference and interpretation. They should be marked plainly with the number of rubs given. Place the test block on its side after using - do not place it on the machine, or lay it on the rubber base.
Wet Rub
Mount the strips in the same manner as for dry rubs, using the two point test block. Preset the tester for one rub. Place three to six drops of water on the printed surface so that they will be covered by the test block. Place the block in position and immediately press the `Start’ button. After one stroke, examine both surfaces for colour transfer. Repeat single strokes until ink failure is noted or the surface of the sample shows fuzz or abrasion.
Wet Bleed or Transfer
Mount a 2 x 5¼ inch blotter strip on the two pound test Receptor with the felt or smooth side out, and saturate the blotter with water (an eyedropper is convenient). Place the wet blotter on the sample to be tested and leave in place for four minutes. Remove the block without rubbing and examine for ink transfer to the blotter.
Wet Smear
Use a water-saturated blotter on the two pound Receptor and actuate the tester for one stroke. Examine the blotter for colour transfer. In cases where extreme water resistance is required, more rubs may be specified. An alternate procedure consists of mounting a 2 x 6 inch piece of 80 x 80 count bleached muslin on the two pound test Receptor over a blotter as specified above. This procedure has been found particularly useful since it eliminates the effects of surface abrasion on the blotting paper.
Functional Rub
Functional Rub is a term embracing a number of miscellaneous uses for the Rub Tester. An ink which is acceptable under the outlined test procedures may fail under exposure to foreign liquids or pastes. For example, certain inks might be tested to conform to specifications such as `One rub, Cod Liver Oil, or `Three rubs, Jones Antacid Toothpaste’.
In reporting functional rubs, the operator must specify the number of rubs, the time of contact before rubbing, and the special conditions and testing mediums employed.
Evaluation of Tests Results
A practical approach should be emphasised in test evaluation. Few, if any, inks will pass rubbing, wet or dry, without a slight transfer of colour. Decisions on the suitability of an ink are best made by running comparative tests, checking an acceptable sample at the same time and under the same conditions.
Consideration must be given to the time interval between printing and testing, particularly with slow drying inks. Also, prints should be protected from dust and dirt between printing and testing. An attempt should be made to use test samples which are representative of the run, i.e. eliminating the use of sheets with excessive anti-offset materials, or sheets taken from the top of a load which may have collected dust or foreign material.
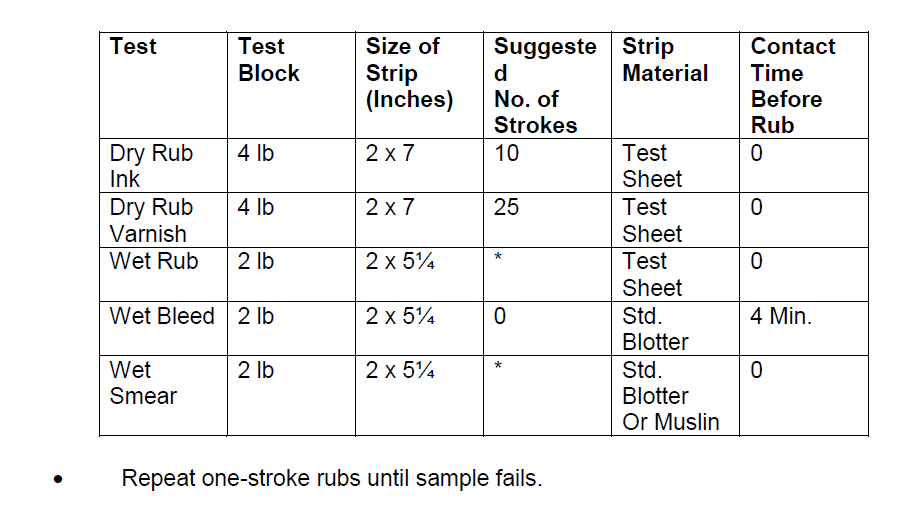
Rub Chart
Optional Items
Heated Weights 2lb (IDM-I0001-OP1) & 4lb (IDM-I0001-OP2)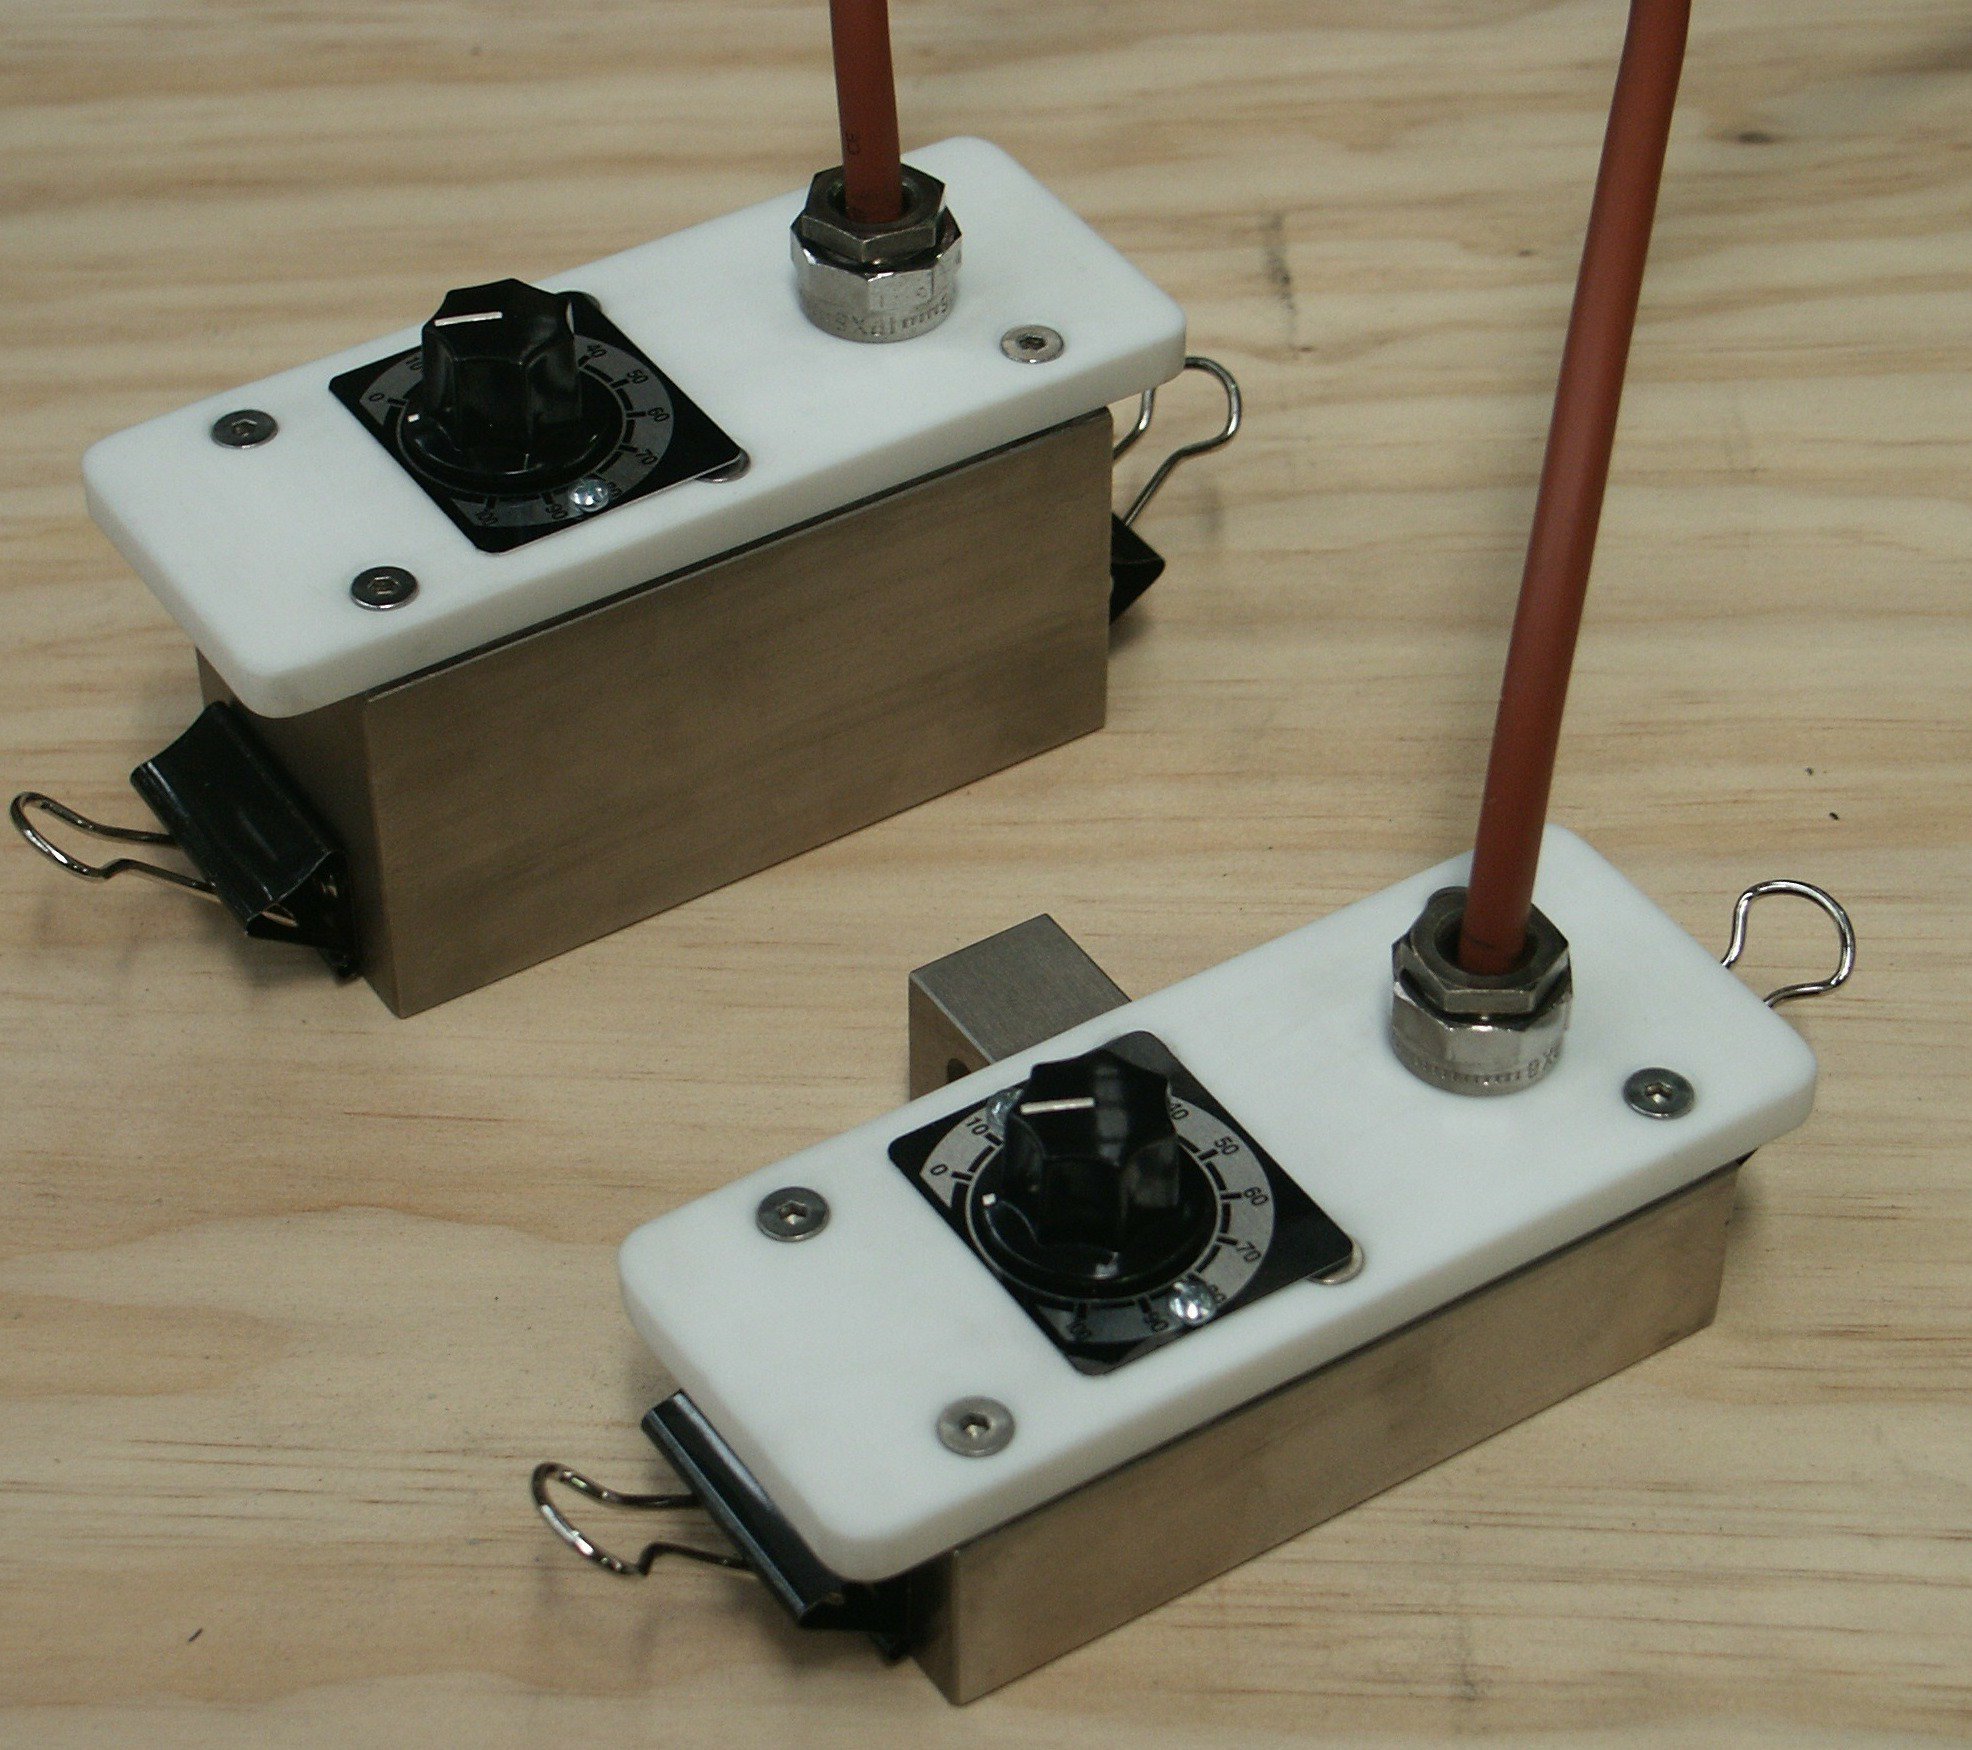
- Ambient to 150°C
- Standard BS 3110: 1959- Method 1
2lb & 4lb Heated Weights can be supplied with the IDM Ink Rub Tester that have a thermostat control and can operate from ambient to 150°C. The heated weights can be connected directly into the Rub Tester for operation.
Cap Scuffing Fixture (IDM-I0001-OP4) 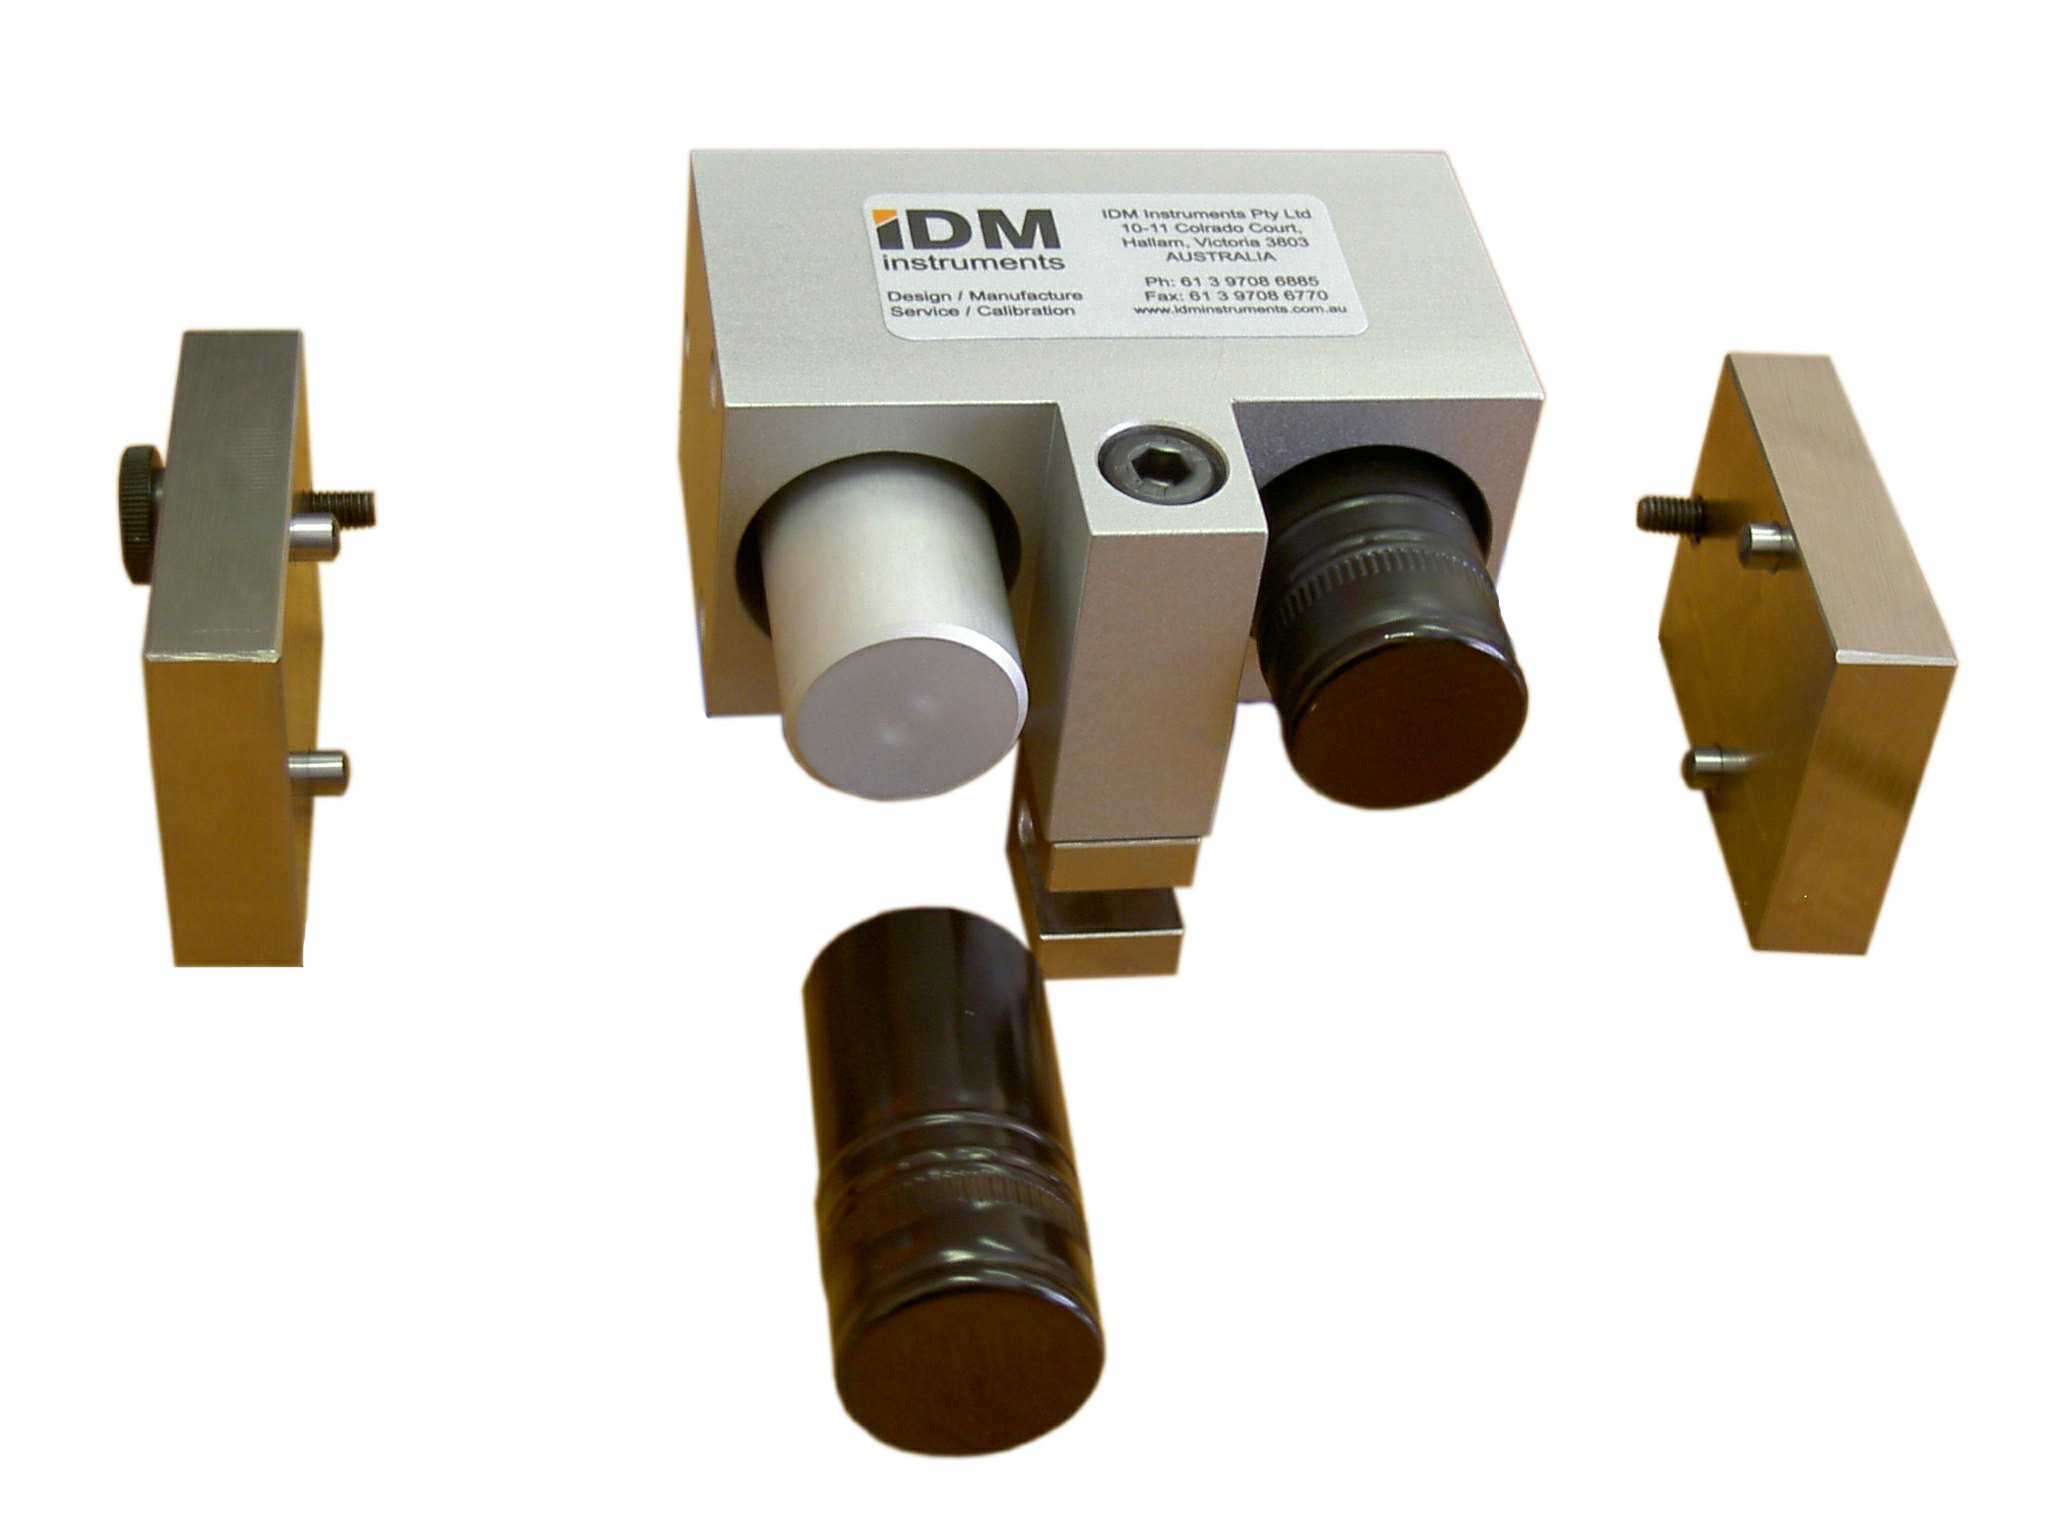
- 2 x Ø26mm Cap Mandrels
- 2lb or 4lb weight by removing end weights
- Options: Fixtures to hold different size caps on application